Photography Tips That Will Improve Your Shots Immediately
Photography is a process of trial and error, pushing boundaries, and finding new visual ways to tell a story. It is ever-changing, forcing us to be willing to listen to our surroundings and then learn. I genuinely believe it is a passion for learning and being ready to give back and help others.
Because of that, here are four travel photography tips to help you improve your shots! Better yet, they are all outdoor photography tips that you can use immediately to better your photography and create stunning landscape shots!
Brands I Trust For My Gear
REI – Peak Design Clip, Tripods, Camera Bags
Adorama
See Cameras and Lenses I Recommend
Photography Tips That Will Make You A Better Photographer
Use Long Exposure When Possible
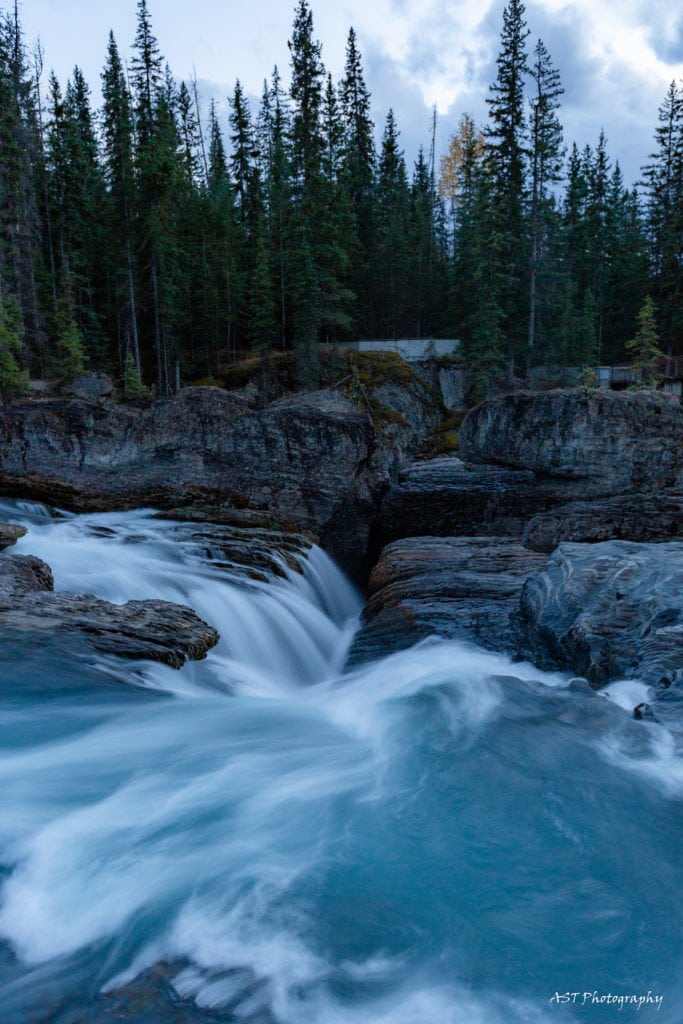
I love long exposures. I think it stems from our inability to experience the photo in real life. Used mainly for waterfalls or to calm a rough lake, long exposures allow us to stop time in its tracks. However, one underrated use of long exposures is of clouds. A long exposure of them can create some incredible shots in a scene with fast-moving clouds. This is by far my favorite photography travel tip I like to share.
What you’ll need for long exposures:
- A tripod or a flat rock to set your camera.
- If shooting in daylight, use an ND filter to keep your photo from being overexposed.
How to Shoot Long Exposures:
- Move your shutter speed to anywhere from 0.5 sec to 5 seconds.
- Depending on the lighting conditions and ND filter, set your f/stop to f/13-f/22.
- Bring your ISO to as low as it’ll go.
Arrive early and scout before you shoot
Getting to a location 30–45 minutes before golden hour isn’t just about catching the light — it’s about having time to walk the area, find your composition, and set up without rushing. When you’re scrambling to frame a shot as the light peaks, you almost always miss it.
Arriving early lets you be present, see what the landscape is actually offering you, and be ready when everything lines up. Some of my best compositions came from first wandering around a location without a camera in hand.
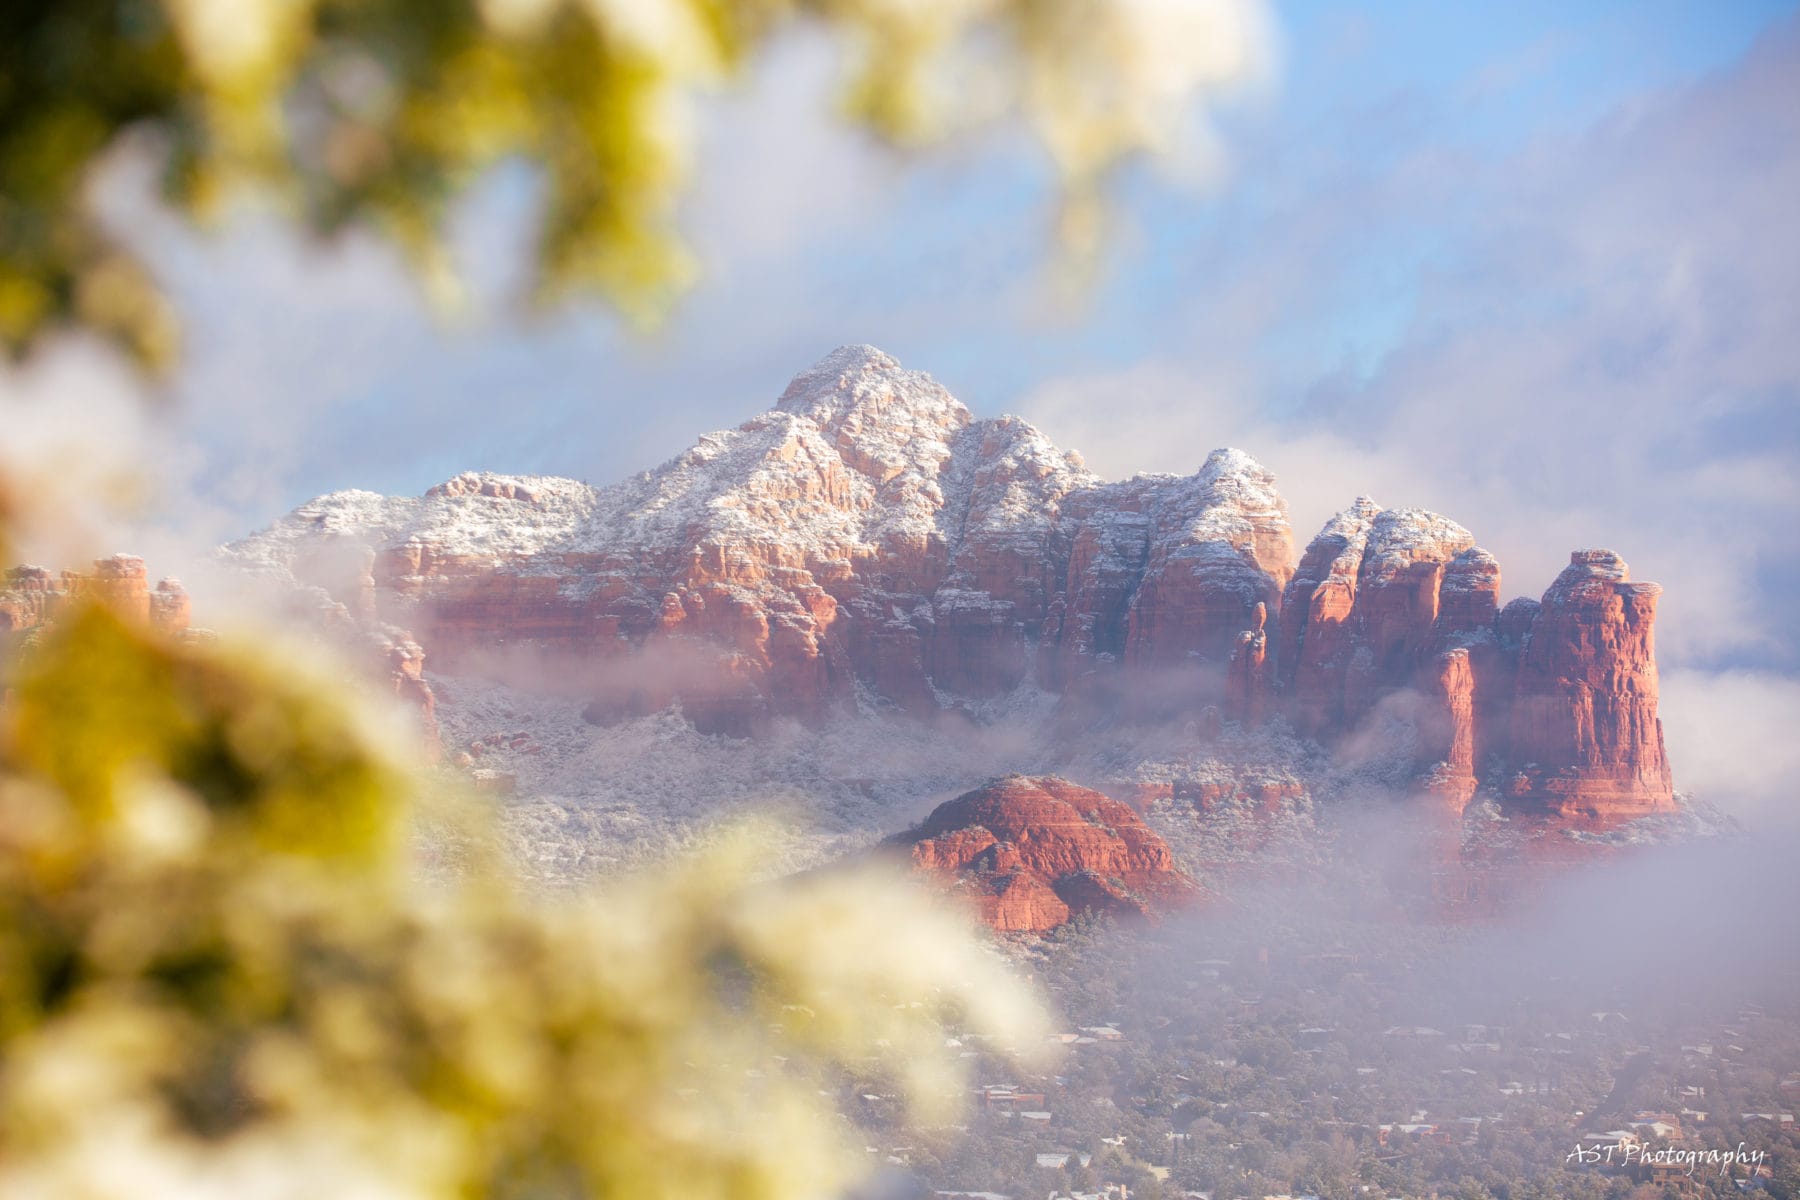
Add depth and framing by putting something in the foreground

Finding new ways to compose and stage a photo, such as putting something in the foreground or framing it with leaves or rocks, can turn a photo someone’s seen a thousand times into one they’ve never seen before. It’s a foolproof way to put a twist on a classic shot. Taking this approach requires more effort and means you have to think big yet act small.
You’ll have to take the time to look at everything around you, then find a small area that would be perfect for framing your creation. I have been trying to do this more often, forcing me to be more creative and abstract.
Looking up to upgrade your camera gear? Click here.
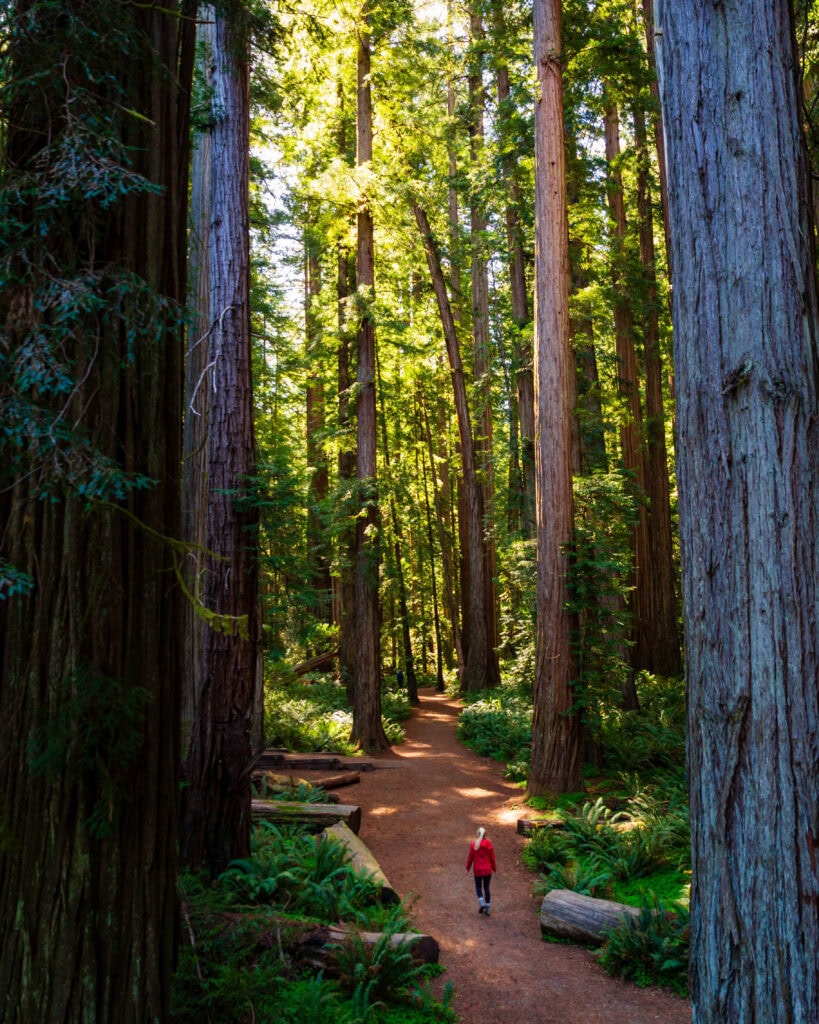
Change your perspective. Literally.

This one can be fun! My two favorite ways to change a photo’s perspective are getting as close to the ground as possible (think kneeling or lying down), attaching your camera to your tripod, and lifting it above your head.
Most people shoot in a structured way, standing tall and from their eye level. By instead slightly changing your posture, you can create an image with your unique flair that will stand out in a crowd. This can really come to life with wildlife photography.
Another option would be standing on top of your truck or van. I don’t have that luxury with my car, but I would recommend that to others who can!
Shoot in RAW, not JPEG

If you’re still shooting in JPEG, this is the one change that will have the biggest impact on your photos overnight. RAW files retain all the data your camera captures, giving you far more flexibility in post-processing to recover highlights, lift shadows, and fine-tune color without any degradation.
JPEG bakes those decisions in for you, and not always in your favor. Make the switch, give yourself the creative control you’ve earned, and thank yourself later.
Bracket your shots

One of my top outdoor photography tips is bracketing. This one I found through trial and error. I love shooting in the mountains, and as the sun sets, the valleys below become dark far more quickly than the sky above. As a result, you tend to blow out your sky to illuminate the valley, or the valley is black while your sky looks nice.
With bracketing, a setting that is easy to turn on in your camera settings, it will take three photos at different shutter speeds. This allows you to get your shots in the correct light. Then, in post-processing, you can merge in Lightroom to create one image that looks incredible.
I can’t speak to Sony or Nikon users, but for Canon shooters, click Menu and then go to the second camera page. Click on exposure comp/AEB.
Here, you’ll be able to choose your bracket settings. I usually stick to a one-degree difference on both sides. To get this to work best, also have your camera on rapid shooting, as you’ll want your three shots to happen together to decrease shake and camera movement.
Learn to read the weather — and lean into “bad” conditions

Some of my favorite shots have come from days that looked terrible on paper: overcast skies, incoming storms, dramatic fog rolling through a valley. Most photographers pack up and head inside when the weather turns, and that’s exactly when you should be outside.
A stormy sky will always be more dynamic than a flat blue one, and moody light creates depth and emotion that perfect conditions simply can’t replicate.
Check your weather app, learn what’s coming, and treat dramatic weather as an invitation, not a warning.
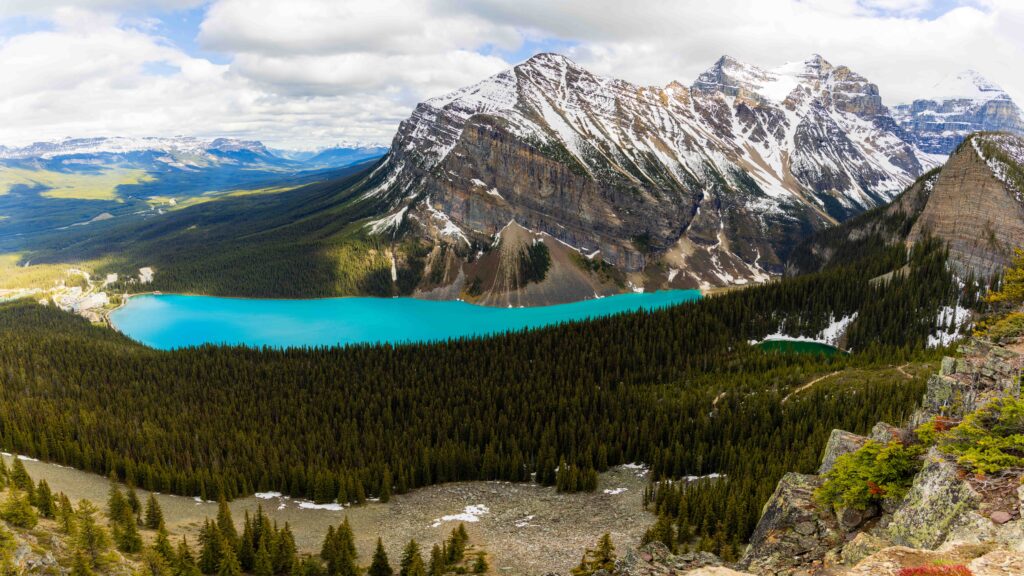
Use leading lines to pull the viewer into the frame
Leading lines are one of the most powerful compositional tools available to you, and they’re everywhere once you start looking — a winding trail, a river cutting through a meadow, a row of trees, a fence disappearing into the horizon.
The goal is to give the viewer’s eye a natural entry point and a direction to travel within your frame. Done well, a leading line makes someone feel like they’re walking into the photo rather than just looking at it.
It’s a simple concept that separates intentional photographers from accidental ones.
Edit with intention, not habit

Most people develop an editing style early and then just repeat it on autopilot, cranking saturation and dehaze the same way on every single image. The best edits serve the story of that specific photo — a cold, blue-toned winter shot should feel different than a warm desert sunrise.
Spend time asking yourself what emotion you want the viewer to feel, and let that guide your sliders. Consistency in your style is important, but consistency doesn’t mean every photo gets the exact same treatment.
Bonus outdoor photography tips: Find a way to wake up early for sunrise

This has nothing to do with your camera and more to do with you. Sunsets are easy to shoot; you’re already up. For sunrises, you need mental fortitude to wake up and, in some places, leave a warm, cozy bed for the chilly outdoors. However, and this is one I truly believe, you never regret waking up to shoot a sunrise.
I’ve found my most incredible photos are those taken at sunrise. So brew that cup of coffee, set multiple alarms, and get up to shoot sunrise. You won’t be mad if you do!
Final Thoughts on these Outdoor Photography Tips
Photography is a lifelong journey, and its beauty lies in the fact that you never truly stop learning. Every location, every changing light, every unexpected storm is an opportunity to try something new, make mistakes, and come away a better photographer than you were before. The tips above aren’t rules. They’re starting points. Take what resonates, experiment with the rest, and make them your own.
At the end of the day, the best photo you’ll ever take is the next one. So charge your batteries, set that early alarm, and get outside. The light is waiting for you.
Thanks for reading, and I hope you enjoyed these photography travel tips and outdoor photography tips.
Until next time, adventurers, stay safe.
Follow on social media: TikTok || Instagram || Facebook || Newsletter | YouTube